- Look in the Class Materials folder inside the Shared Media folder and find the file called, Tim Burton_Tones. Copy it to your hard drive.
- Open Pro Tools and create a new session called: your name_TimBurton EQ

- Import the TimBurton_Tones file to a new track and listen to it. Note the spots where you hear annoying tones creeping into the audio.
- Insert a 7 Band_EQ3 plugin on the track.
- Let's deal with the high frequencies first...Find the section called HF.

- Click on this button to turn it from a Shelving EQ into a Parametric EQ.

- Narrow the bandwidth by turning the Q knob straight up to 12 o'clock.

- Turn the Gain knob up to about 15.0 dB.
 You should see a big blue spike in the window above.
- Now play the audio back. As you listen, click on the FREQ knob and drag it up or down. You are listening for the point right where the annoying high frequency gets the loudest. When you find that frequency, WRITE it down somewhere. You'll need this later.
- Now click on the GAIN knob and drag it all the way down to -18.0 dB.
 If you do this correctly, the voices shouldn't sound any different, but the annoying frequency should go away.
 - Now find the section of the EQ called LF.

- Repeat Steps 6-10 to get rid of the annoying low frequency. Write down the number of that frequency.
- Save your session.
- Now open your BAVC gmail account and email me (crunde@bavc.org) what the two frequencies were that you found.
Tuesday, March 16, 2010
{EQ assignment 2_Parametric EQ}
Now you are going to practice using an EQ plugin to get rid of some bad frequencies in an audio clip. Please do the following:


Fundamentals of Sound (pt. 2)_Harmonics

Last time we got into some of the basics of sound, discussing the two main attributes:
Frequency and Amplitude
Today we're going to get a little deeper into this stuff so that we can understand how it relates to the music we make.
Quick recap: last time we learned that frequency is basically dealing with pitch - how high or low a sound is. We measure frequency in cycles per second, or Hertz (Hz). Let's listen to a few tones to calibrate our ears:
So what we were listening to were pure tones. Here is a picture of what a pure 440 Hz tone (aka "Concert A") looks like:
 What we have been looking at and listening to so far are what are called sine waves. Sine waves are basically pure tones - nice and smooth and even, no additives or preservatives. But, as with so many things in life, reality is almost never so smooth and even...
Here is what Concert A (aka 44oHz) looks like when played by a grand piano:

Whoa. Lots of stuff going on here. I should point out that this picture is zoomed way out, so we're not seeing the individual waves like we were in the picture of the sine wave. But my point is this: there is a LOT more than just a simple 440Hz sine wave playing when you hit the A key on a piano.
Major point #1: Almost no natural sound contains only one frequency.
You might be asking yourselves then, "What are the other frequencies?"
Short answer: harmonics.
OK, so I just lost about half the class with that last sentence. But it's really not that complicated. Check it out:

So, we're looking at the first 5 harmonics of a vibrating string. The first harmonic is what is called the fundamental frequency. The fundamental is like the "main note" being played. For example, in the picture of the piano note above, 440 Hz is the fundamental, but all that other stuff in the waveform is a bunch of harmonics:
1st harmonic (aka fundamental) = 440Hz
2nd harmonic = 880Hz (440 x 2)
3rd harmonic = 1320 Hz (440 x 3)
4th harmonic = 1760 Hz (440 x 4)
5th harmonic = 2200 Hz (440 x 5)
Every musical instrument has harmonics, but the amounts and combinations of these harmonics are unique to every instrument. This is why a guitar sounds like a guitar, a snare drum like a snare drum, Mariah Carey like Mariah Carey, etc.
Here is a comparison of a flute, a clarinet, an oboe, and a saxophone all playing Middle C (256 Hz):
 As you can see, they are similar (they are all instruments from the woodwind family), but it is the unique harmonic content that gives each one a unique sound.
Major Point #2: Even though different instruments (including human voices) have different frequency ranges, most of them overlap.
Here is a chart that shows some instruments and their ranges (click on the picture to see a larger image):
 For example, a violin, an MC's voice, and a snare drum may all contain a lot of the same frequencies. This is important to understand when you're mixing music because if you have a bunch of instruments all playing in the same general area of the frequency spectrum, it means that they are all competing for the listener's attention. So, what you want to do is give each one its own special spot in the mix. You do that by cutting certain frequencies and boosting others.
Cutting and boosting- that's the basic concept. Now let's talk about the tools you have to accomplish this. There are basically two types of EQ that you use in mixing:
1. Shelving EQ - This is simple. With a shelving EQ, you're just boosting or cutting everything above or below a specific frequency. This is a more general tool that lets you make adjustments to big sections of your sound. You will generally have one for dealing with the High Frequencies, and one for the Low Frequencies. Here's a chart:
 2. Peaking (aka Parametric) EQ - This one let's you zero in on a very specific frequency range to cut/boost. This is a more precise tool for working with really detailed parts of the sound. Generally, you will have a couple of these that are meant to be used in the Low-Mid and Hi-Mid ranges. Here's a chart:

This is what the Digirack EQ plugin that comes with Pro Tools looks like:

Notice that there are five sections of EQ (not including the filters). The middle three sets are all Parametric EQ. The ones on the far left and far right can be EITHER Parametric or Shelving, depending on how you set them. They will normally be set to Shelving.
Really knowing how to EQ is an art form and, just like any other art, takes years of practice to really master. Just remember:
LESS IS MORE. Something that is recorded halfway decently should not need more than a little EQ adjustment. Anything more than +/- 6 dB is a pretty big adjustment.
Quick recap: last time we learned that frequency is basically dealing with pitch - how high or low a sound is. We measure frequency in cycles per second, or Hertz (Hz). Let's listen to a few tones to calibrate our ears:
So what we were listening to were pure tones. Here is a picture of what a pure 440 Hz tone (aka "Concert A") looks like:
 What we have been looking at and listening to so far are what are called sine waves. Sine waves are basically pure tones - nice and smooth and even, no additives or preservatives. But, as with so many things in life, reality is almost never so smooth and even...
Here is what Concert A (aka 44oHz) looks like when played by a grand piano:

Whoa. Lots of stuff going on here. I should point out that this picture is zoomed way out, so we're not seeing the individual waves like we were in the picture of the sine wave. But my point is this: there is a LOT more than just a simple 440Hz sine wave playing when you hit the A key on a piano.
Major point #1: Almost no natural sound contains only one frequency.
You might be asking yourselves then, "What are the other frequencies?"
Short answer: harmonics.
Harmonics are whole number multiples of a specific frequency.
OK, so I just lost about half the class with that last sentence. But it's really not that complicated. Check it out:

So, we're looking at the first 5 harmonics of a vibrating string. The first harmonic is what is called the fundamental frequency. The fundamental is like the "main note" being played. For example, in the picture of the piano note above, 440 Hz is the fundamental, but all that other stuff in the waveform is a bunch of harmonics:
1st harmonic (aka fundamental) = 440Hz
2nd harmonic = 880Hz (440 x 2)
3rd harmonic = 1320 Hz (440 x 3)
4th harmonic = 1760 Hz (440 x 4)
5th harmonic = 2200 Hz (440 x 5)
Every musical instrument has harmonics, but the amounts and combinations of these harmonics are unique to every instrument. This is why a guitar sounds like a guitar, a snare drum like a snare drum, Mariah Carey like Mariah Carey, etc.
Here is a comparison of a flute, a clarinet, an oboe, and a saxophone all playing Middle C (256 Hz):
 As you can see, they are similar (they are all instruments from the woodwind family), but it is the unique harmonic content that gives each one a unique sound.
Major Point #2: Even though different instruments (including human voices) have different frequency ranges, most of them overlap.
Here is a chart that shows some instruments and their ranges (click on the picture to see a larger image):
 For example, a violin, an MC's voice, and a snare drum may all contain a lot of the same frequencies. This is important to understand when you're mixing music because if you have a bunch of instruments all playing in the same general area of the frequency spectrum, it means that they are all competing for the listener's attention. So, what you want to do is give each one its own special spot in the mix. You do that by cutting certain frequencies and boosting others.
Cutting and boosting- that's the basic concept. Now let's talk about the tools you have to accomplish this. There are basically two types of EQ that you use in mixing:
1. Shelving EQ - This is simple. With a shelving EQ, you're just boosting or cutting everything above or below a specific frequency. This is a more general tool that lets you make adjustments to big sections of your sound. You will generally have one for dealing with the High Frequencies, and one for the Low Frequencies. Here's a chart:
 2. Peaking (aka Parametric) EQ - This one let's you zero in on a very specific frequency range to cut/boost. This is a more precise tool for working with really detailed parts of the sound. Generally, you will have a couple of these that are meant to be used in the Low-Mid and Hi-Mid ranges. Here's a chart:
This is what the Digirack EQ plugin that comes with Pro Tools looks like:

Notice that there are five sections of EQ (not including the filters). The middle three sets are all Parametric EQ. The ones on the far left and far right can be EITHER Parametric or Shelving, depending on how you set them. They will normally be set to Shelving.
Really knowing how to EQ is an art form and, just like any other art, takes years of practice to really master. Just remember:
LESS IS MORE. Something that is recorded halfway decently should not need more than a little EQ adjustment. Anything more than +/- 6 dB is a pretty big adjustment.
Thursday, March 11, 2010
{Filtering Assignment}
Today we're going to start working a bit with frequency using a type of processor called an Equalizer (aka "EQ").
"What is an EQ?" you ask.
Well, an EQ lets you boost or cut a specific frequency ranges in your tracks.
"Why would you want to do that?" you ask.
Well, because generally you want certain things to stand out more in your mix, and other things to be more in the background. Cutting/boosting certain frequencies can help you do this. Also, you can make things sound cleaner and clearer. It's sort of like having a toolkit for working on the details of your tracks.
Today we're just going to work with a very basic and extreme form of EQ-ing, called filtering.
First let's listen to an example of filtering on a vocal in a song:
In the first verse of the song, could you hear how the vocal sounded kind of weird, almost like it was coming through a telephone? Since we all use phones a lot, we tend to associate this sort of sound with talking on the phone. This effect was probably achieved through the use of filters; in the mix, they filtered out the high and low parts of the singer's voice. When you talk into a phone, the phone is not able to reproduce the high and low frequencies of your voice, so what the listener on the other end hears is essentially a filtered version of your voice.
"What is an EQ?" you ask.
Well, an EQ lets you boost or cut a specific frequency ranges in your tracks.
"Why would you want to do that?" you ask.
Well, because generally you want certain things to stand out more in your mix, and other things to be more in the background. Cutting/boosting certain frequencies can help you do this. Also, you can make things sound cleaner and clearer. It's sort of like having a toolkit for working on the details of your tracks.
Today we're just going to work with a very basic and extreme form of EQ-ing, called filtering.
First let's listen to an example of filtering on a vocal in a song:
In the first verse of the song, could you hear how the vocal sounded kind of weird, almost like it was coming through a telephone? Since we all use phones a lot, we tend to associate this sort of sound with talking on the phone. This effect was probably achieved through the use of filters; in the mix, they filtered out the high and low parts of the singer's voice. When you talk into a phone, the phone is not able to reproduce the high and low frequencies of your voice, so what the listener on the other end hears is essentially a filtered version of your voice.
Filtering simply lets you completely cut out a certain frequency range (highs, lows, etc.) and leave the remaining parts. This can be really useful when you are mixing and want to make sure that certain sounds that have similar frequency ranges don't clash with each other. It can also be used to create specific effects, as we just heard. Today, I want you to get some experience with filtering a vocal. We're going to use the filters on an EQ plugin to cut off the high and low frequencies to and imitate the "telephone effect".
Please do the following:
Please do the following:
- Open a Pro Tools session that has vocals on it (e.g Color Scheme, Rob's Life, Friday Night, etc).
- Pick a vocal track that you want to work with. Solo it by clicking the yellow S button.
- Pick a specific region and loop it. Hit play.
- Go to the Mix Window.
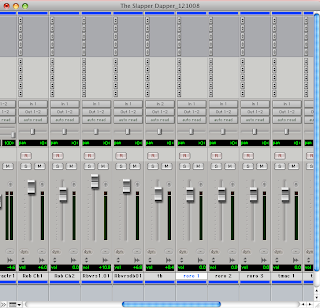
- In the Inserts section at the top of the track, click on one of the sets of double arrows. Click on Plugin>EQ>7-band EQ3
 You should see this window pop up:
- Find the sections called HPF and LPF,
 click the IN buttons to turn them on.
- Now find the spots where it says 6dB/Octave. Turn up the knobs until it says 12dB/Octave.

- In the HPF section, turn up the FREQ knob until your voice starts to sound kind of thin. Make a note of what frequency this happens at (about 1kHz).
- Now in the LPF section, turn down the FREQ knob until the voice starts to muffle a little and sound more like it's coming through a phone. Note what frequency this happens at (about 2kHz). The frequency screen should look something like this:

- Try Inserting EQs on different tracks and play around with all the different knobs in other parts of the EQ and see how they affect the sound of your tracks.


Fundamentals of Sound (pt. 1)_Frequency & Amplitude
 So far we've discussed a bunch of different topics, from music theory to hip hop history to navigating software. Today we're going to talk a little about the science of sound.
What is sound?
On the most basic level, sound is the vibration of molecules. Since we live in an air-filled atmosphere, sound for us is usually the vibration of air molecules.
Whenever there is any kind of impact or friction in our air-filled environment, the air molecules get compressed and are pushed out of their normal positions. They then react by springing back in the other direction. Same concept as a pulling a piece of string tight and then plucking it; the molecules swing back and forth.
 When molecules vibrate, they get pushed out of their normal positions and bump into their neighbor molecules. This causes the neighbor molecules to vibrate, and bump into their neighbors, which bump into their neighbors, and so on. These vibrations spread out in all directions in waves, sort of like dropping a rock in a pool of water.
  This is how the sound gets to your ears. The waves move outward from the sound source at a steady rate, but they get weaker and weaker (quieter and quieter) as they move farther and farther away...
If we try to draw a picture of a sound vibration, we get something like this:
 A picture like this is called a waveform. By now, we're all used to seeing waveforms from our recordings in Pro Tools. And as you probably remember from editing, when you zoom in really close, then we see something like this:
What this picture is showing you is one vibration, or cycle. If we think back to the example of the plucked string, this is the equivalent of the string being plucked, then swinging out in the opposite direction, then coming back to its original position. But when you pluck a string, does it just vibrate once and then stop? Of course not! It vibrates many times, but let's keep this idea of cycles in mind as we get to the main topic for today...
FREQUENCY and AMPLITUDE
Here are the basics of what you need to understand:Frequency = pitch (Hz)
Amplitude = loudness (dB)
Amplitude = loudness (dB)
Frequency is the number of cycles that happen in one second. The higher the pitch of the sound, the more cycles (aka vibrations) are happening in each second. Therefore, a note played on a high pitched instrument, like a flute, is going to have many more of these cycles in one second than a low pitched instrument, like an 808 bass drum. In the waveform diagram below, the horizontal (left to right) axis is showing frequency. You can see certain sections where the cycles are pressed more tightly together than in other parts. Do you think these parts are lower or higher in pitch compared to the parts where the cycles are spaced out more?
The unit of measurement of cycles per second is Hertz (Hz).Amplitude is the amount of energy that goes into making the sound, i.e. how LOUD the sound is. If I slam my hand down on the table, it makes a much louder sound than if I lightly tapped the table with my finger. This is because I put a lot more energy into making the sound and our ears interpret the amount of energy as loudness. In the waveform diagram, the height of the wave is showing you the amplitude.
The unit of measurement of amplitude is the decibel (dB).Last and thing to know for today:
The human range of hearing is approximately 20Hz to 20,000Hz.
With this information, we can start to get into really working with sound and making it do what we want! (Mwah ha ha!).
Next time, we will get into the wonderful world of harmonics...
Tuesday, March 9, 2010
Color Scheme remixes

Today we're going to be presenting our remixes of Dat's song, "Color Scheme".
In order to do this, everyone needs to put a copy of their Pro Tools session in the folder called Color Scheme_030910 on the Shared Media Drive. IMPORTANT: please also put a copy of your Reason beat inside the Pro Tools folder.
When you present...
Tell us a little bit about your work. How did you approach the song? Were you trying to get the same vibe as the original, or were you trying to switch it up at all? What kinds of instruments did you use and why? Did you do to the vocal tracks?
When you are listening/watching other people's presentations...
Please give your classmates feedback. I want you to send an email to the presenter's BAVC gmail account with at least 3 thoughts about their work. You can tell them things you like about what they did with the beat. You can also give them constructive criticism on what could be done to make the song even tighter.
Remember, the goal here is not to make people feel bad about their work, but rather to help each other improve our skills and build on our strengths.
Thursday, March 4, 2010
{Do D.A.T. collabo_pt. 3}
Hopefully by now you're pretty close to finishing up a beat for your remix of "Color Scheme". Today we're going to focus on mixing the vocals to sound as good as possible.
The areas I want you to focus on are:
Since this is a song that has a strong vocal on it, you want to make sure that the main vocal really stands out so you can hear it. Listen closely to your beat and how loud it is relative to the vocal. If the beat is as loud or louder than the vocal, TURN IT DOWN a bit. Go to the Mix Window and pull down the fader of the Aux track that has Reason on it.
Also, the doubles tracks and adlibs should not be as loud as the main vocal. Try turning them down a bit so that they are supporting the main vocal, but not competing with it.
Compression
You should all be somewhat familiar with using a compressor and what it does to the sound of a vocal track. I want you to spend some time compressing Dat's vocals and getting them to sound nice and fat. In a professional recording, usually almost every vocal track has some compression. If you want to compress them all, go for it. At the very least I want you to compress the main vocals on the verse and the chorus:
Panning
Panning allows you to place certain instruments/tracks to the left or the right side of the stereo field. Doing this you can make your mixes richer and more interesting. Take a minute to listen to a bit of this track by Daedalus and hear how he's using panning. Pay attention to where the instruments are, from left to right:
If you go to your Mix Window, each channel has a section that looks like this:
 To pan the track, just click and drag the slider to the left or the right. Generally, you want to keep the main vocal in the middle, and the backing tracks (doubles, adlibs, etc.) somewhere to the left or the right. For this song, one place to use panning would be on the chorus where Dat is repeating certain phrases ("black faces", "white cops", etc.).
I would also encourage you to pan some of the instruments in your beat. In Reason, you can adjust the panning with these knobs in the Mixer:

Reverb on an Aux track
The last thing I want you to do is to set up an Aux track with Reverb on it and see what it sounds like to send some of the vocals to it. To set this up, do the following:
The areas I want you to focus on are:
- Balance the volume levels of the vocals and your beat
- Compressing the vocals
- Panning
- Using reverb with an Aux track.
Since this is a song that has a strong vocal on it, you want to make sure that the main vocal really stands out so you can hear it. Listen closely to your beat and how loud it is relative to the vocal. If the beat is as loud or louder than the vocal, TURN IT DOWN a bit. Go to the Mix Window and pull down the fader of the Aux track that has Reason on it.
Also, the doubles tracks and adlibs should not be as loud as the main vocal. Try turning them down a bit so that they are supporting the main vocal, but not competing with it.
Compression
You should all be somewhat familiar with using a compressor and what it does to the sound of a vocal track. I want you to spend some time compressing Dat's vocals and getting them to sound nice and fat. In a professional recording, usually almost every vocal track has some compression. If you want to compress them all, go for it. At the very least I want you to compress the main vocals on the verse and the chorus:
- DAT v1.01
- DATchorus
- DATchrsl 1
Panning
Panning allows you to place certain instruments/tracks to the left or the right side of the stereo field. Doing this you can make your mixes richer and more interesting. Take a minute to listen to a bit of this track by Daedalus and hear how he's using panning. Pay attention to where the instruments are, from left to right:
If you go to your Mix Window, each channel has a section that looks like this:
 To pan the track, just click and drag the slider to the left or the right. Generally, you want to keep the main vocal in the middle, and the backing tracks (doubles, adlibs, etc.) somewhere to the left or the right. For this song, one place to use panning would be on the chorus where Dat is repeating certain phrases ("black faces", "white cops", etc.).
I would also encourage you to pan some of the instruments in your beat. In Reason, you can adjust the panning with these knobs in the Mixer:

Reverb on an Aux track
The last thing I want you to do is to set up an Aux track with Reverb on it and see what it sounds like to send some of the vocals to it. To set this up, do the following:
- Create a Stereo Aux Input track.
- In the Inserts section of that track, create a D-Verb reverb processor (Multi-channel plugin>Reverb>D-Verb)
- In the Inputs section of the Aux track, select Bus 1-2
- In the Sends section of one of the vocal tracks, select Bus 1-2.
- You should see a floating fader that pops up. Raise this fader to start sending the track to the reverb.
Tuesday, March 2, 2010
{Do D.A.T. collabo_pt. 2}
Last week we got a chance to work with Do D.A.T. and do some recording on his song, "Color Scheme". This week we're going to take the Pro Tools session and make our own beats to do some remixes with him. Then we will work on properly mixing the vocals and, finally, bouncing out audio files to share with him next week.
Today, I want you to focus on the following:
Preparing the session
There are a couple of things that you need to do with this Pro Tools session before you can jump into making a beat for it.
Tempo
First, we need to figure out a tempo for this track. We can do this by creating a Click Track and listening to how fast it is compared to the original beat. We then adjust the click until it is perfectly in time with the beat. I will demonstrate how to do this so that we can figure it out as a class. All you will need to do is change the tempo when you open the session on your computer.
For future reference though, this is how you do it
Using a Click Track to figure out the Tempo:
Now that we know the correct tempo, we can turn on Grid Mode and we should be able to make our edits exactly in time to the song. Click on the Grid button in the upper left corner of the Edit Window: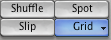 You should now see a bunch of blue lines in the Edit Window, which means your grid is setup.
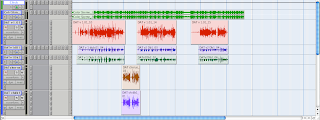 If you don't see the blue lines, you probably need to adjust the Grid settings. Ask an instructor for help.
Copying the Chorus
A really common technique (especially in hip hop) is to record the chorus vocals once and then copy them to all the different sections of the song where you want the chorus to be. This helps to give a really consistent feel to the hook, though it can also take away some of the flavor of the track.
To copy the chorus, do the following:
Now that you've got all your Choruses in place, you should be ready to kick it off and start making a beat.
First, mute the original beat, the full song track and the Click Track.
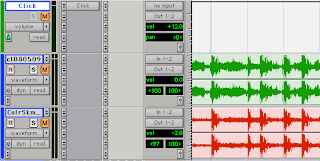
Now Create a Stereo Aux Input track and Insert Reason on it. (If you forgot how to do this, click here and scroll down to Step 7.) Make something cool!
Please don't forget to SAVE both the Pro Tools session AND your Reason beat. Save them both as: your name_Color Scheme
Today, I want you to focus on the following:
- Preparing the session so that you can work with it. (Adjust the tempo, set up Grid Mode, copy the chorus)
- Making your beat
Preparing the session
There are a couple of things that you need to do with this Pro Tools session before you can jump into making a beat for it.
Tempo
First, we need to figure out a tempo for this track. We can do this by creating a Click Track and listening to how fast it is compared to the original beat. We then adjust the click until it is perfectly in time with the beat. I will demonstrate how to do this so that we can figure it out as a class. All you will need to do is change the tempo when you open the session on your computer.
For future reference though, this is how you do it
Using a Click Track to figure out the Tempo:
- Create a Click Track by going to Track>Create Click Track

- You should see a new Track called "Click" appear in the Edit Window.

- Hit play and listen to the song play back. You should hear a slightly annoying click that is out of time with the beat.
- Now let's change the Tempo. Double-click on the little red triangle in the left side of the Timeline.
 You should see this window pop up:
- As you listen to the song, start adjusting the BPM number in the Tempo Window. Hint: highlight the number and just press the Up/Down arrows on your keyboard.
- When you get the click happening exactly on the beat, click on the OK button to close the Tempo Change window.


Now that we know the correct tempo, we can turn on Grid Mode and we should be able to make our edits exactly in time to the song. Click on the Grid button in the upper left corner of the Edit Window:
 You should now see a bunch of blue lines in the Edit Window, which means your grid is setup.
 If you don't see the blue lines, you probably need to adjust the Grid settings. Ask an instructor for help.
Copying the Chorus
A really common technique (especially in hip hop) is to record the chorus vocals once and then copy them to all the different sections of the song where you want the chorus to be. This helps to give a really consistent feel to the hook, though it can also take away some of the flavor of the track.
To copy the chorus, do the following:
- Zoom in really close on the beginning of the chorus so that you can see the number of each Bar in the timeline.
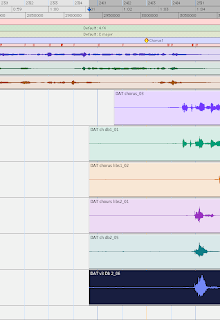
- See how some of these regions start at different points? Use the Trim Tool
 and adjust the beginnings of the chorus regions so that they all start at the same place (Ch1 = Bar 24/3).
- Zoom out so you can see the whole song. Look for where you think the next chorus will start.
- Now click on the Grabber Tool.

- Hold down Shift on your keyboard and click on each of the chorus regions one by one so that they are all highlighted.

- Let go of the Shift key and hold down the Option key. Click and drag the chorus regions roughly over to the start of the next chorus section.
- Zoom in on the second chorus section and move the regions so they all start at exactly the right point (Ch2 = Bar 48/3)

- Repeat steps 5-7 and put one more chorus at the end of the song (Ch3= Bar 72/3)


Now that you've got all your Choruses in place, you should be ready to kick it off and start making a beat.
First, mute the original beat, the full song track and the Click Track.

Now Create a Stereo Aux Input track and Insert Reason on it. (If you forgot how to do this, click here and scroll down to Step 7.) Make something cool!
Please don't forget to SAVE both the Pro Tools session AND your Reason beat. Save them both as: your name_Color Scheme
Subscribe to:
Posts (Atom)
