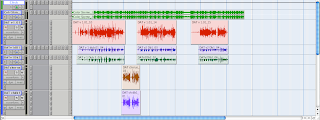
Today, I want you to focus on the following:
- Preparing the session so that you can work with it. (Adjust the tempo, set up Grid Mode, copy the chorus)
- Making your beat
Preparing the session
There are a couple of things that you need to do with this Pro Tools session before you can jump into making a beat for it.
Tempo
First, we need to figure out a tempo for this track. We can do this by creating a Click Track and listening to how fast it is compared to the original beat. We then adjust the click until it is perfectly in time with the beat. I will demonstrate how to do this so that we can figure it out as a class. All you will need to do is change the tempo when you open the session on your computer.
For future reference though, this is how you do it
Using a Click Track to figure out the Tempo:
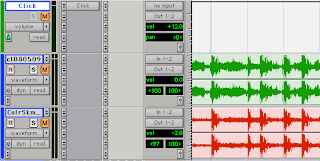
- Create a Click Track by going to Track>Create Click Track

- You should see a new Track called "Click" appear in the Edit Window.

- Hit play and listen to the song play back. You should hear a slightly annoying click that is out of time with the beat.
- Now let's change the Tempo. Double-click on the little red triangle in the left side of the Timeline.
 You should see this window pop up:
- As you listen to the song, start adjusting the BPM number in the Tempo Window. Hint: highlight the number and just press the Up/Down arrows on your keyboard.
- When you get the click happening exactly on the beat, click on the OK button to close the Tempo Change window.
Now that we know the correct tempo, we can turn on Grid Mode and we should be able to make our edits exactly in time to the song. Click on the Grid button in the upper left corner of the Edit Window:
 You should now see a bunch of blue lines in the Edit Window, which means your grid is setup.
 If you don't see the blue lines, you probably need to adjust the Grid settings. Ask an instructor for help.
Copying the Chorus
A really common technique (especially in hip hop) is to record the chorus vocals once and then copy them to all the different sections of the song where you want the chorus to be. This helps to give a really consistent feel to the hook, though it can also take away some of the flavor of the track.
To copy the chorus, do the following:
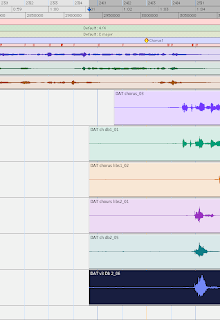
- Zoom in really close on the beginning of the chorus so that you can see the number of each Bar in the timeline.

- See how some of these regions start at different points? Use the Trim Tool
 and adjust the beginnings of the chorus regions so that they all start at the same place (Ch1 = Bar 24/3).
- Zoom out so you can see the whole song. Look for where you think the next chorus will start.
- Now click on the Grabber Tool.

- Hold down Shift on your keyboard and click on each of the chorus regions one by one so that they are all highlighted.

- Let go of the Shift key and hold down the Option key. Click and drag the chorus regions roughly over to the start of the next chorus section.
- Zoom in on the second chorus section and move the regions so they all start at exactly the right point (Ch2 = Bar 48/3)

- Repeat steps 5-7 and put one more chorus at the end of the song (Ch3= Bar 72/3)

Now that you've got all your Choruses in place, you should be ready to kick it off and start making a beat.
First, mute the original beat, the full song track and the Click Track.

Now Create a Stereo Aux Input track and Insert Reason on it. (If you forgot how to do this, click here and scroll down to Step 7.) Make something cool!
Please don't forget to SAVE both the Pro Tools session AND your Reason beat. Save them both as: your name_Color Scheme

No comments:
Post a Comment