Tuesday, November 24, 2009

More Audio Effects

(Part 2 of a 2-part guest lecture by Quinn Gibson)


Parameters of the Redrum


Pitch- Effects how "Hi" or "Low" sounding a hit is


Velocity- Effects Softness & Loudness of particular hit


In addition to reverb and delay here are some other commonly used effects that will help you on your musical voyage. But first a quick vocab lesson.


Timbre: Also called shape. Two instruments can play the same note, but sound differently. Why is that? Because the timbre or shape is different.


Distortion- Alters original timbre or shape of sound.


megaton b-boy 2000


Mobb Deep - Shook Ones Part 2


Phaser- Filter & LFO ; Whirly

Bonita Applebum


Chorus/Flanger- Shimmering quality; Result of roughly same timbre & pitch being played at the same time.

Black Hole Sun


Is It A Crime


Appregiator- "Broken Chord"

Stop Running Away


Exercise 2

Create another 16-Bar Song

1) Create Redrum drum pattern using distortion and light reverb.


2) Next create a 4 bar melody using a synthesizer with a phaser or chorus effect. Duplicate tracks and Use same melody in last 8 bars of song using appregiator effect.


Audio Effects & Parameters:Reverb, Delay & the ADSR Envelope- An Electronic Love Story

(Part 1 of a 2-part guest lecture by Quinn Gibson)

So you have a catchy hook, a nice melody, and even an interesting song arrangement( verse, bridge, hook). However there is something else you can do to make your song sound more flavorful and interesting. Welcome to the wonderful world of effects & parameters (fireworks and drumrolls).


Parameters vs. Audio Effects


Audio Effect

*An additional "thing" that is added to process or transform original sound.


Parameters

* "Knobs" & "Sliders" that already come with a particular sampler or synthesizer, or effect. Tells the instrument or effect how to behave.


We'll first look at the parameter known as the ADSR Envelope. To my knowledge this is on every instrument based sampler and synthesizer in reason, but for this demonstration we'll be using the NN-19 digital sampler.


A.D.S.R. Envelope


Attack

How quickly the sound reaches full volume after the sound is activated (the key is pressed). For most

mechanical instruments, this period is virtually instantaneous. However, for some popular synthesized voices that don't mimic real instruments, this parameter is slowed down. Slow attack is commonly part of sounds called pads.


Decay

How quickly the sound drops to the sustain level after the initial peak.


Sustain

The "constant" volume at which the sound remains following the decay until the note is released. Note that this parameter specifies a volume level, not a time period.


Release

How quickly the sound fades when a note ends (the key is released). Often, this time is very short. An example where the release is longer might be a percussion instrument like a glockenspiel, or a piano with the sustain pedal pressed


I might be wrong-Radiohead


Reverb


Reverberation is the persistence of sound in a particular space after the original sound is removed. A reverberation, or reverb, is created when a sound is produced in an enclosed space causing a large number of echoes to build up and then slowly decay as the sound is absorbed by the walls and air.


* Causes effected instrument to have a spacious roomy feel.

* The original sound ceases but the reflection of the sound continues.


Reason has to types of reverb

-Digital Reverb

-Advance Reverb


Delay


*Used interchangeably with echo.

*Same sound repeated at different intervals of time until point of decay.


Dr.Octagon 3000


Exercise 1


*Create a 16 bar song with a melody and drum section.


-Utilize the ADSR Envelope on instrument sampler or synthesizer.

-Use Reverb on Redrum.

1) With the proper instrument highlighted in the instrument rack go to the Create menu and click the Digital Reverb.


-Use delay effect on last 8 bars of given sampler or synthesizer :


1) With the proper instrument highlighted in the instrument rack go to the Edit menu and click on "Duplicate devices and tracks".


2) Once this copy is created click on the duplicated device ,labeled "copy" on the side, and go to the Create menu and click the Digital Delay Line Effect.


Thursday, November 19, 2009

{Reason - Fade Outs}

One easy and effective way to end a song is to "fade it out". This just means having the music gradually get quieter and quieter, like the song is fading off into the distance.

In Reason, it is very easy to do a Fade Out.

Just follow these easy steps:
  1. Make sure your Mixer has a track in the Sequencer.
  2. Click on the Mixer track to highlight it.
  3. Find the end of your song.
  4. Decide what bar you want your fade out to start and end on.
  5. Click on the Automation button and select Master Level.
  6. Click on the Switch to Edit Mode button.
  7. Scroll until you find the Bar where you want to start your fade out.
  8. Click on the Pencil Tool.
  9. Click and drag a box from the start and end of where you want the fade to happen.
  10. Click once on the start point.
  11. Click once on the end point.
  12. Now click on the Selection Tool.
  13. Click on the end point of the fade and drag it down to the bottom of the track.
  14. Play the end back and make sure it sounds right.
  15. Make any necessary adjustments.

Song Structure (pt.2) - Intro, Bridge, Outro


Now that we are getting really comfortable with the Verse/Chorus format for our songs, let's take the time today to talk about a few other common parts of song structure that are used to make music more interesting: the Intro, Bridge and Outro.

Intro
  • The opening to the song.
  • Purpose is to builds suspense up to when the song really gets going (usually at the first Verse or Chorus).
  • A very common technique is to start with either the melody, or the drums but not both. That way, the listener is waiting for that missing element and is more excited when it finally comes in.
  • Can be as long as you want (just don't let the listener get too bored!). A common length is 4-8 Bars.

Bridge
  • A short middle section that is different from either the Verse or the Chorus.
  • Often comes in after the second or third Chorus.
  • Helps to break up the pattern of Verse/Chorus/Verse/Chorus and keep the listener interested.
  • Usually 8 Bars.
Outro
  • The end of the song.
  • Brings everything to a close and makes the listener feel like they've come to the end of the story.
  • There are a few common ways to do an Outro: 1) just have the music end suddenly, 2) have it fade out, 3) bring in a new sound/instrument.
  • Can be as long or as short as you want, but it should feel natural for the song.
Let's compare these elements in a few tunes now:


So, for today, you are going to be finishing up the songs you started on Tuesday. By the end of today, I want everyone to turn in 1 (preferably 2 songs) that have all of the following parts:
  • At least 3 Verses, 3 Choruses, an Intro, a Bridge, and an Outro (fade out).
  • Verses should have at least 4 instruments
  • Choruses should have at least 5 instruments, including a Combinator.
  • Some variation in the instruments on the Verses (different instruments coming in at different times).
When you finish, put them into the Student Work folder on the Media Share drive. (Macintosh HD>dolly>Media Share>Student Work)


Please be sure to save these files with your name in the filename:

Example: your name_Song 1, your name_Song 2

Monday, November 16, 2009

Song Structure (pt.1) - Verse & Chorus


Now that we know our way around the keyboard and most of the instruments in Reason, I want to take a little time to really learn about how songs are put together...

There are lots of different ways you can structure music and different types of music tend to have their own rules about it. Generally speaking, in most types of popular music, you have two or more parts that trade off, go and repeat throughout the song. Why do you think this happens?

I would say that there are two main reasons:
  1. Repetition - people tend to like it when they hear a part of a song that they have heard before. Since they remember it and know how it's going to go, that helps them to sing along, dance, and experience the music.
  2. Variety - If you just repeat the same part over and over again, it gets boring pretty fast! But if you switch it up a little by having a couple of different parts trading off, you can keep things fresh for the listener.
Since in this class we're mainly working with various types of Western pop music (hip hop, rock, etc.), we are going to focus on a Pop song structure. Today, we're going to focus on two particular parts: Verses and Choruses.

Verses
  • are the parts of the song where the story is told.
  • The lyrics usually change from verse to verse, but the instrumental (rhythm and melody) generally stays the same.
  • There are often fewer instruments and the music is more mellow in this section. This helps the listener concentrate on the lyrics and hear what the singer/MC is saying. It can also help the Chorus seem more exciting when it hits.
  • The length of a verse can vary; in a typical hip hop song, verses are 16 bars long.

Choruses (aka "hooks")
  • are the parts where the music and lyrics are repeated throughout the song.
  • are usually the most exciting parts, where the energy (and volume!) are the highest.
  • are the parts that people are most able to sing along with; they usually have fairly simple, easy to remember lyrics.
  • usually have more instruments than in the verse.
  • is usually shorter than the verse; in a typical hip hop song, choruses are 8 bars long.
So let's take a quick minute to practice our listening skills. See if you can pick out the Verse and Chorus of each of the following songs:


Get Up Stand Up - Bob Marley


Me Against The World - 2PAC

In each case, was there a difference between the melody in the verse and the chorus? What about the actual instruments? Also, how did the two songs start? Which part came first, the verse or the chorus?

For today's assignment, you will be focusing on developing solid verse and chorus sections in your beats, and then developing them into basic song structures. Then, on Thursday, you will be adding some additional parts, such as Intros, Outros, Bridges and PreChoruses.

Today you have 2 things to do:

Part 1
1. Create a Verse section for your song.
  • At least 16 Bars long
  • At least 4 instruments
2. Create a Chorus section for your song.
  • At least 8 Bars long
  • At least 5 instruments
  • Uses a Combinator
3. Now Copy and Paste these two sections so that you have at least 3 Verses and 3 Choruses in your song. Start with whichever one you like.

4. Add any additional touches to your Verses to keep them interesting. If you get bored listening to a whole verse section, try to think of what you can add or subtract to keep things flowing.

5. Save it!!!

Part 2
Go back to one of your old beats and create a structure for it in the same way as you did for the above.

(Part 3 - if you have time)
Try to come up with an original intro to your two songs. Figure out how it should begin before the full beat really drops.

Thursday, November 12, 2009

{Make It Up!!!}

Some of you have missed some classes. Specifically, the following folks have missed the following classes:

Anthony - 11/10
Canique - 11/10
Eddie - 10/15, 11/12
Gerardo - 11/12
Jake - 10/15, 11/05, 11/12
Jose - 10/06
Madan - 10/20
Monica - 10/15

As a friendly reminder, you will NOT receive a stipend at the end of the Fall/Winter term unless you have done all your hours. To help you make sure that doesn't happen, you can do one of the following things to make up your hours:

1) Come to a MAKEUP LAB. The next one will be on Friday, November 20, 4-7 pm. There will also be another one in December. But keep in mind that if you have missed more than 2 classes, then it is already more hour

2) *Special Assignment*
I have been talking to some of the people who put out the movie, "Copyright Criminals" that we went to check out a few weeks ago. They were really excited to hear that we saw the film and would like to know what we think about it. I am willing to give you credit for 1 class (3 hrs.) if you do the following assignment:
  • Write a 6-7 sentence paragraph about what you thought about the film. Specific things to talk about would include: what it made you think about sampling, how it changed/did not change your views, specific scenes from the film that you found interesting, whether you think it's good for producers/musicians to see it.
  • Turn it in to me by next Thursday, November 19.
  • I will proofread it and may ask for one round of revisions.

Wednesday, November 11, 2009

Minor, minor, synthesizer


Today we are going to keep on working with the two things that were introduced in the last class: 1) the Minor Scale, and 2) synthesizers.

So first of all, let's refresh our memories about the Minor Scale. The formula is...

W-H-W-W-H-W-W


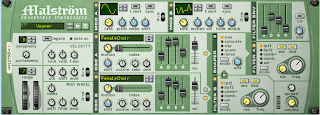
Last time we started working and getting familiar with the Subtractor Analog Synthesizer. Today, we will continue working with the Subtractor and we will also get to know another Reason synthesizer, the Malstrom.
The difference between the two synths has to do with the way that they create their sounds. We will learn a little more about this later, but for now, you could say that the Subtractor is better at creating old-school, 80's style sounds, while the Malstrom is better at creating more complex, modern sounds.

So, let's just jump into today's lesson...


Part 1
Fill out the worksheet to find the notes of a Minor scale that you are going to work with today.

Part 2
  1. Start a new Reason file.
  2. Create a Redrum Drum Machine.
  3. Set the Tempo to whatever you like.
  4. Make a 32-step drum beat.
  5. Move your R marker so that it is on Bar 5.
  6. Zoom in so that you can clearly see Bars 1-5.
  7. Use Copy Pattern to Track to put your drum beat into the Sequencer.
  8. Make sure the Loop On/Off button is lit up.
  9. Create a SubTractor Analog Synthesizer.
  10. Click on the Browse Patch button.
  11. Load a sound from the Bass, MonoSynths, or PolySynths folder.
  12. Using your Minor Scale worksheet as reference, come up with a main melody to go over your drums. Record it. Remember, you can ONLY use notes from the minor scale you figured out!
  13. Create a second SubTractor Analog Synthesizer.
  14. Click the Browse Patch button and load another sound from the MonoSynths, Pads, or PolySynths folder.
  15. Come up with a simple second melody to go with the first one. Just a few notes is fine.
  16. Now Mute the second Subtractor by clicking on the M button.
  17. Create a Malstrom Graintable Synthesizer.
  18. Click on the Browse Patch button.
  19. Load a sound from the Bass, MonoSynths, Pads, or PolySynths folders.
  20. Come up with another simple melody to go over your original Subtractor melody.
  21. Zoom out so that you can clearly see Bars 1- 17.
  22. Copy and Paste (OPTION-drag) your drums and first Subtractor melody so that they end on Bar 17.
  23. Click the M button on the 2nd Subtractor to un-Mute it.
  24. Now move your 2nd Subtractor and Malstrom melodies around so that they are in an order that sounds good. For example: or
  25. More the R Marker so that it is on Bar 17.
  26. Listen to the whole beat play back and make any necessary changes.
  27. Add any additional instruments you want.
  28. Save this as: your name_MinorSynth
If you finish quickly, try moving your L Marker to Bar 17 and your R Marker to Bar 25. Come up with a hook section!