Thursday, April 29, 2010

{Audio post: Ghost Dog ADR_pt2}


Today let's finish up the Ghost Dog projects from last time. Once you've got your ADR recorded, you should concentrate on the following:

Part 3 - The Score
You guys are all pros on producing scores by now. For this piece, the challenge is to try to figure out what the mood of the scene is and make that happen musically. What would you say was the mood of the original piece? How did the composer (the RZA) help to create the mood with music?
  1. Create a Stereo Aux Input
  2. Insert Reason on it.
  3. Create an original piece of music that fits the mood of the scene.
Part 4 - FX
This part is sort of optional, but can help to make the scene more convincing, if you want to try. In the original scene, there were hardly any sounds beyond the dialog and the music (there is a faint sound of pigeons fluttering at the end).

The one thing I want you to add is some street sounds in the background when the dialog happens.

You can add some additional sounds if you choose with the following restriction: do NOT add sounds that distract the audience's focus from what's happening visually! (e.g. gunshots, screaming, random sounds, etc.)

Here are a few ideas for sounds that would be appropriate:
  • Pigeons
  • Footsteps
Part 5 - Editing & Mixing
This is really important. Once we've got all of our sound elements in the session, we need to make sure that they're all clean and balanced correctly. We also want to add some

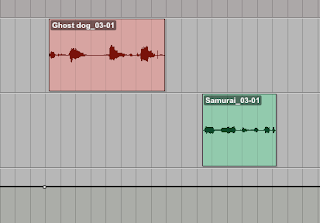
First, clean it up...
  1. Use the Trim Tool to cut off the extra bits at the beginning and ends of the dialog regions.
Now let's set up a good balance by paying attention to the overall levels of all the tracks.
  1. Go to Track>New and create a Stereo Master Fader.
  2. In the Inserts section of Master Fader track, click on Multichannel Plugin>Sound Field>Phase Scope. You should see this pop up:The meters on the left side will help us to see exactly how loud the peaks of our tracks are.
  3. Now Solo the dialog tracks.
  4. Play the part with the dialog back and watch the levels on the Phase Scope meters.
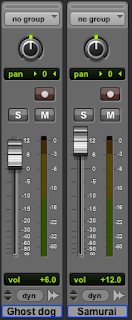
  5. Important: dialog in audio post production should hit about -6dB at its loudest parts. If your dialog is not loud enough, turn up the faders on the tracks so that the peaks are at -6dB.
  6. Unsolo the dialog tracks.
  7. Listen to the whole thing including the music. How is the balance between the music and the dialog? In general, they should be about the same volume (we're going to adjust this next), but if the music is way louder or softer than the dialog, raise or lower it to whatever it needs to be.
Now let's make it so that when the characters start speaking, the music dips down a little bit and we can hear them better...
  1. Use the Grabber Tool.
  2. Zoom in so that you can see the dialog clips well.
  3. On the Aux Track, you should see a line that goes across the screen showing the volume level. Right before the dialog starts, click on the line to create a dot.
  4. Click on the line at the end of the dialog to create another dot.
  5. Make two more dots in between the beginning and the end of the dialog.
  6. Click and drag these dots down to make the volume come down during this scene and then come back up at the end.
  7. Listen back to this scene and move the dots around to adjust them. The goal is to make this dip sound smooth and not very noticeable to the audience.
  8. Save
When you think you've got everything done, have an instructor check your work. If it's all good, do the following:
  1. Bounce to Quicktime movie.
  2. Name the file: your name_Ghost Dog ADR
  3. Put a copy of the Quicktime movie in Shared Media>Student Work>Ghost Dog ADR

Tuesday, April 27, 2010

{Audio post: Ghost Dog ADR}

Today we're going to start working on a project that involves two of the areas of audio post-production that we have been discussing: ADR and scoring. In addition, we're going to use some mixing techniques to give the piece an interesting and (hopefully) believable flow.

First, let's watch the clip we're going to be working with. This is a scene from the 1999 movie, Ghost Dog, directed by Jim Jarmusch and starring Forest Whitaker. Check it out:

What are the main sound elements we can hear in this scene?
What kind of mood is the music creating?
What do we notice about the volume levels throughout the scene?
Is there anything about the dialog that you think might be challenging?

So, you are now going to work with this clip and replace all the sound with your own...

Part 1 - Preparing the Session

Please do the following:
  1. Look in Shared Media>Class Materials>Film clips and find the file called: Ghost Dog_RZA.mp4
  2. Copy the file to your computer.
  3. Pick a partner.
  4. One of you needs to create an Empty Pro Tools session called: Ghost Dog ADR
  5. In the session, create 3 Mono Audio tracks.
  6. Label one audio track: Ghost Dog
  7. Label the other audio track: Samurai
  8. Label the 3rd track: TB
  9. Import the video into your project.
  10. Play it back and listen carefully for the part where the Samurai in Camouflage (the RZA) starts speaking. Drop a marker exactly at this point. Name it: RZA
  11. Save this session and quit out of Pro Tools.
  12. Put a copy of the Pro Tools session in your folder on the Shared Media drive.
Part 2 - Recording ADR
You are going to work with a partner to record the ADR for this scene. You will play one character and he will play the other. You will take turns engineering and preforming the lines. Here is the dialog:

Samurai in Camouflage: Ghost Dog, power, equality.
Ghost Dog: Always see everything, my brother.

Please do the following:
  1. On the Instructor Station, copy your Ghost Dog ADR Pro Tools session to the folder called Student PT Sessions on the desktop.
  2. Open the session.
  3. Check your Mic Inputs and make sure they match this setup:
  4. Decide which one of you is going to play Ghost Dog, and which one is going to play the Samurai.
  5. Have the first person go in the vocal booth, and the other person set recording levels.
  6. Make sure that the video clip is big enough and the monitor is angled so that the performer to see the lips of the characters.
  7. Do a few practice run-throughs and decide if you want to record while listening to the original audio, or if the track should be muted.
  8. Record!
  9. If you get a take that you think is good, but you want to try another one, create a new Playlist by clicking on the little triangle next to the track name, and then clicking on New.
  10. When it asks for a name for the Playlist just click OK.
  11. Record as many times and create as many playlists as you need to get a good take.
  12. Switch positions with your partner and repeat Steps 5-11 for the other character.
  13. When you think you're done, SAVE the session.
  14. Put a copy of the session in your folder on the Shared Media folder.
  15. Go back to your desks and copy the PT Session to each of your computers.
  16. Open the session and pick the best playlists for each character.
  17. Do some basic editing to clean up the audio (trim the edges, fade ins/outs, etc.)

Audio Post: ADR

Did you know that most of the dialog that you hear in a movie was not recorded at the time when the scene was actually being shot? A lot of the actors' lines were rerecorded in a studio in order to get better sound quality, or sometimes a better performance. This process is called Automated Dialog Replacement, or ADR. The trick is for the actor to be able to recreate the emotion from the scene and make it sound as natural as possible. Here is a clip showing the ADR process on the film "King Kong".


Real ADR is done through a process called looping, where a short scene is played over and over and the actor performs his/her lines repeatedly until he/she gets them just right. It is the mixing engineer's responsibility to make the recording sound as believable as possible in the scene. Think about it...if the scene takes place in the middle of, say, an empty parking lot,
are the voices going to sound the same as they do inside a padded vocal booth? Of course not! So, the engineer has to figure out how he/she can match the sound of the actor's voice to the place being shown on the screen. This is done by making decisions in the recording process (microphone choice and placement) and in the mix afterward (using reverb, EQ, pitch adjustment, and other FX to make it sound like the character is in the actual setting on screen).

Today, we're going to do a little bit of our own ADR...

Thursday, April 22, 2010

{Audio Post: Score2_Theme}


Today we're going to work on a specific area of film scoring: the theme.

According to Wikipedia:

A theme (or "leitmotif") is "...is a phrase or melodic cell that signifies a character, place, plot element, mood, idea, relationship or other specific part of the film. It is commonly used in modern film scoring, as a device to mentally anchor certain parts of a film to the soundtrack."

Last time, we talked briefly about the example of Darth Vader from Star Wars and the theme music associated with him. Today, we're going to listen to another theme from Star Wars and work on creating our own themes for a specific scene from the movie.

"Why are we spending so much time talking about Star Wars?" you ask.

Because along with many other areas of film making, Star Wars had a major influence on the way other film scores were made after it came out. The composer, John Williams, is one of the most famous film composers in the history of cinema. One of the things that it made popular in modern movies was the idea of having themes in the score that are associated with specific characters and ideas. This is part of what makes the music so memorable and recognizable.

So, let's take a look to a few scenes:


What do you think this theme represents?
What kind of mood does it create in your mind?
Is it connected to a specific character or idea?
How is it put together or structured?
What kinds of instruments are used?

Now you are going to create your own theme for the Binary Sunset scene.

Please do the following:
  1. Look in Shared Media>Class Materials>Film Clips and find the file called StarWars_Binary Sunset.mov. Copy it to your computer.
  2. Launch Pro Tools and make a new Blank Session. Name it: your name_ForceTheme
  3. Import the Binary Sunset Quicktime movie into your session.
  4. Watch the clip a few times and think about how you are going to create a theme for it. What kind of mood? What kinds of instruments? Will the music change at a certain point? Feel free to listen to the original version if you need some ideas!
  5. Go to New Track and create a Stereo Aux Input track.
  6. Insert Reason on the Aux Track.
  7. Create a theme!
  8. Save.
  9. Bounce everything to a Quicktime movie. Name the file: your name_ForceTheme
  10. Put a copy on Shared Media in Student Work>Force Theme

Tuesday, April 20, 2010

{Audio post: Score 1_Scary}


One of the classic cases where a score is used to build up emotion is in a scary sequence when you know something bad is going to happen. You know it's coming, you know the character should do something different, but they're going to fall right into the trap! And the whole time, the music is building and building until...BAM!

Basically, whether you were consciously aware of it or not, the music just helped to manipulate you to feel a certain way, even though your brain already knew what was going to happen.

Question: what kinds of instruments do you typically hear in scenes like this? Why do you think those instruments are used so much?

Today, you are going to do this. Please do the following:
  1. In the Shared Media folder, look in Class Materials>Film Clips>Freddy Clips and copy the file called Chase.mov to your computer.
  2. Create a new Pro Tools session and name it: your name_scary score
  3. Import the Chase movie clip into your session.
  4. Watch the clip through a few times to get a feel for when specific things happen that should have a musical equivalent. Drop memory locators at these points.
  5. Set the mode to Grid.
  6. Try to change the Tempo so that you can get some of the memory locators to fall right on the first beats of the grid.
  7. Create a Stereo Aux Input track.
  8. Insert Reason on this track.
  9. Make scaaaarrry music!
  10. Bounce the music to a Quicktime movie. Call it: your name_scary score
  11. Put a copy in the Shared Media Folder in: Student Work>Scary Score
  12. Save your Pro tools session.

Audio Post: Score

Last week we spent time focusing on and getting some experience working with sound FX. This week, we are going to turn our attention to another crucial part of audio post-production: the score. In case you forgot...

The score is the music that is created to go along with a film/video.

Wikipedia says:

"A film score is actually the background music of a film (which is generally categorically separated from songs used within a film). The term soundtrack is often confused with film score, but a soundtrack also includes anything else audible in the film such as sound effects and dialogue. Soundtrack albums may also include songs featured in the film as well as previously released music by other artists. A score is written specifically to accompany a film, by the original film's composer(s)...since the 1950s, a growing number of scores are electronic or a hybrid of orchestral and electronic instruments. Since the invention of digital technology and audio sampling, many low budget films have been able to rely on digital samples to imitate the sound of real live instruments."

What do you think is the purpose of the score? Why do we need music in movies?

Well, actually, not all movies have a score, or sometimes they use music very lightly. But most films have some kind of music to help enhance the emotions/moods of the different scenes. This can be important so that the audience has some direction on how to feel about what they are seeing.

For example, let's say you have a scene of a woman walking down the street. There is no dialogue in the scene, so we don't know exactly what she's thinking. Is she happy? Angry? Determined? Worried? Music can help us easier interpret what she is thinking without her saying a single word! Also, in scenes without dialogue, the absence of sound can make the scenes feel very slow and/or empty, so the music can help to move the story along.

Music can also be created to give specific characters their own themes. These themes usually come in throughout the movie whenever the character appears onscreen. A classic example of this would be Darth Vader's Theme (The Imperial March), composed by John Williams for the Star Wars movies:


Thursday, April 15, 2010

Using Aux Inputs for FX

OK, so today we're going to learn about how you can use the Aux Sends in Pro Tools to put an effect on a bunch of tracks at once.

First of all, what the #*!& is an Aux Send?

An Aux Send is a part of a mixing board that lets you take the signal from one track and direct it somewhere else.

Why would you want to do that?

One big reason is to have a multiple tracks going to the same FX processor.

Why would you want to do that?
  • versatility - isn't it more useful to have an effect be accessible to every track rather than just one track? Also, you can get really creative by sending sounds to different places and doing different things in the mix.
  • simplicity - instead of putting an reverb on every track, you can just have one reverb and send whatever you want to it
  • less processing power - why make your computer do a bunch of extra work if you don't have to
  • gives your mix a more consistent sound.
So, where do you find the Aux section in Pro Tools? In the Mix Window, it is the light grey section under the Inserts.
When you click on one of the double arrows, you will be asked to choose either
interface or bus. What is the difference?

Interface refers to something outside of the computer - you are talking about running something into or out of Pro Tools.

Bus refers to directing a signal to somewhere else inside Pro Tools, like another track.

Actually, you can create a special type of track in Pro Tools that is meant for being used with the Aux Sends. It is called an
Aux Input and you can create it the same way you would create an audio track: Track>New Track

From there you just change the type of track from audio to
Aux Input.
To setup a basic Aux track with a reverb on it, just do the following:

{Audio post: FX 2_Animation (pt.3)}

Today we're going to finish up our Animation projects. If you still need time to spot all your sound FX, then that is your #1 priority. If you feel like you are done, please let one of the instructors see/hear your project and sign off on it. Then there are a few more things for you to do. Here's a list of your priorities...
  1. Finish placing all your sound FX. Make sure they are in sync with the actions on the screen!
  2. Mix the audio. Adjust volume levels. Pan tracks to the right position (L or R). Add automation to create a sense of motion.
  3. Insert a reverb plugin on an Aux Track and add send certain tracks to it to create a sense of space in certain scenes.
  4. Create 2-3 short pieces of music to go with specific scenes (e.g. the chase scene, the sword fight, etc.). You can either create these in Reason and import the audio files into your PT session, or rewire Reason into the session on an Aux Track.

Tuesday, April 13, 2010

{Audio post: FX 2_Animation (pt.2)}

Today, I want you to keep working on your Audio Post Animation FX project. If you have finished gathering all your sounds and "spotting" them in your session, please spend some time working on the following:
  • Mixing - adjust the volume and PANNING of each track so that everything sounds the way it looks on the screen.
  • Automation - use automation to give movement to your sounds so that they match the actions on the screen. At the very least, please automate the sounds of the cars moving left to right.
  • Add some FX - you don't need to go crazy with this (unless you get all inspired). But I would like for you to at least set up a reverb plugin on an Aux track and send some of your tracks to it to give a more realistic feel to certain sounds (for example, everything happening in the theater).
Here are a few practical tips to help you with this project...

Tracks
How many audio tracks can you have in Pro Tools? How about STEREO audio tracks?

This is actually sort of a trick question, because they increased the number of tracks in the newest version of Pro Tools LE (8). However, since we are working with an older version (7.4), we only have 32 total audio tracks. And since each stereo track is actually 2 audio tracks, you can only have up to 16 stereo tracks.

So, what do you do if you run out of tracks? Well, you have a couple of options:
  1. Put similar sounds onto 1 track. For example, all car sounds, all sword sounds, etc. could be grouped onto a single track, so that you don't have 1 little sound here or there taking up a whole track to itself. As long as you don't need for multiple sounds to be playing at once, you should be cool. Be careful when you are mixing, though, to pay attention to the different volume levels of the different regions on your track. You might have to adjust the gain of some regions to make them sit right in the mix.
  2. Split your Stereo Tracks into Mono and get rid of one of them. This is where it gets tricky, but I'll do my best to show you how to make this happen:
Splitting Stereo Tracks
Let's say I have the following stereo track in my session and I want to split it into mono so that I can cut the number of tracks from 2 to 1.
  1. Right-click on the track name and select Split Into Mono from the list.
  2. You should see two new tracks appear. They are the Left (L) side and Right (R) side of the original stereo track.
  3. Right click again on the stereo track's name and select Hide and Make Inactive from the list. It should disappear.
  4. Now highlight one of the mono tracks by clicking on the track name. Select Delete from the list.
  5. Voila, you're down to one track and have one more free to use for other stuff!
  6. Please note that your track will be panned all the way to the left or the right. Use the pan slider to move it to wherever you want the sound to be coming from.

Thursday, April 8, 2010

{Audio post: FX 2_Animation (pt.1)}

This week we're going to continue to work on our audio post skills by doing all the sound for a short animated clip. Cartoons are another special category of film/video from an audio perspective because there is no original sound to work with, or try to imitate. You get to make up the whole sound of the world from scratch! There are no real rules and you are basically trying to make things sound even bigger and crazier than they do in real life.

Here is a clip of the Disney film, "Steamboat Willie" the first animated short to have a completely post-produced soundtrack (music, dialog and fx)! Pay attention to the kinds of sounds that are being used and try to see if you can think of what sorts of objects were actually being used to make the sounds you're hearing:


For today's assignment, you're going to be working with a modern piece of animation.

Please do the following:
  1. Look on the Shared Media folder and copy the file called dpaa_audio post_fx 2 to your hard drive. (Shared Media>Class Materials>dpaa_audio post_fx2).
  2. Create a new Pro Tools session. Name it: your name_audio post_fx2
  3. Import the Quicktime movie to your session.
  4. Right-click on the audio track and click on Delete to get rid of it.
  5. Watch the whole movie through once to get a feel for the storyline and the tone.
  6. Now watch it again and as you go through it, drop Memory Locators (ENTER key) at all the major actions.
  7. Label your Memory Locators.
  8. Now start importing the FX you need. Import them to the Region List.
  9. Drag your sounds into the Edit Window. Take care to make sure they sync up with the actions in the clip.
  10. Remember, if you can't find a sound you need, you can always use a microphone to record your own original sounds (grunts, human noises, etc.) You can borrow a mic and record at your desk, or transfer your Pro Tools session to the Shared Media drive and come record in the vocal booth. Remember that the goal is to make this as convincing as possible!
  11. Do some mixing. Concentrate on balancing the volume of your different tracks and pan the sounds to match where they are on the screen.
  12. Save this as your name_audio post_FX 2 and have an instructor check it.

Tuesday, April 6, 2010

{Audio post: FX 1_Buster Keaton}


Today you're going to work on placing sound fx to a short video clip. In case you're interested, the actor in the clip is Buster Keaton, one of the great stars of silent film. I recommend you check out some of his stuff if you're interested. This guy did some CRAZY stunts.

The goal today is to make the clip sound as realistic as possible and make the images come to life by adding audio.

Before you start, you need to do a couple of things. Please copy the following items from the Shared Media folder (Shared Media>Class Materials) to your folder on your hard drive:
  • The folder called Hollywood Edge FX Library.
  • The video file called Buster Keaton_Bill1.
Once you've got those copied, you can jump into the first part of today's lesson...

Part 1 - Main FX
  1. Launch Pro Tools and create a new session. Name it: your name_audio post FX1
  2. Import the video clip Buster Keaton_Bill1 into your session (File>Import>Video)
  3. Hit the SPACEBAR to play back the clip and watch it through once. Increase the size of the video window to whatever works best for you. (The resolution is crappy. Nothing I can do about it. Sue me!)
  4. After you have watched it once, stop playback and zoom in on the video region until it fills up the Edit Window.
  5. Now you are going to watch it again, but this time you are going to drop Memory Locators at all the main action points. To drop a Memory Locator, you just hit the ENTER key in the lower right corner of your keyboard. Please drop Memory Locators at all the following points and name them accordingly, along with the Start Times of when the actions happen:
  • Bed 1 - where he gets out of bed.
  • Crash 1 - Where the 1st building falls
  • Crash 2 -Where the 2nd building falls
  • Bed 2 - When he jumps back into bed.
OK, so now you need to find some sounds to actually put into your project...
  1. Go to File>Import and find the Hollywood Edge folder that you copied to your hard drive earlier.
  2. Browse through the folders until you find a few sounds that you think might work in this clip. Use the Preview Sound function at the bottom of the Import Window to quickly listen to the sounds so that you can find the ones that work. Don't be afraid to import lots of different sounds, even if you're not 100% sure about them. You don't have to use everything you import, but it's good to have them in your Region List so that you can grab them quickly if you want to try them out.
  3. When you find ones you want to use, hit the Convert button and then hit Done.
  4. Import these files to your Region List.
  5. Once you have some files in your Region List, pick one that you want to work with first and drag it into your Edit Window. Pro Tools should automatically create a new track for it.
  6. Rename the tracks according to what they're supposed to be (eg. Wind, Crash, Footsteps, etc.).
  7. Now use the Grabber Tool and place the sound around the Memory Locator that you dropped earlier.
  8. Watch the video closely and make sure that the FX are playing exactly in sync with the actions on the screen. You'll probably need to zoom in really closely in order to get them just right.
  9. If the FX are too long, try using the Trim Tool to shorten them.
  10. Now we're going to Import some wind sounds to give the clip some ambience. Import these files the same way you did with the other FX.
  11. Try creating a short Fade In at the beginning of the wind ambience to make it come in gradually.
Part 2 - Footsteps
Footsteps can be one of the trickiest things in audio post! It's hard to get the sounds to line up just right with the images. A lot of the time, the audio post engineer will just record someone moving their feet in time with the video. We're just going to do our best to use pre-recorded footsteps and edit them to the picture.
  1. Go into the Media Share folder and find the folder called Footsteps (Media Share>Class Materials>footsteps). Copy this into your Hollywood Edge folder on your hard drive.
  2. In Pro Tools, preview these footstep sounds and Import one of the files into your project on a new track.
  3. Move the region so that it is in the general area where the character starts walking/running.
  4. Now Split up the individual steps into separate regions by using the Apple E command.
  5. Using the Grabber Tool, move the regions so that they line up with the actual steps. If you need to, copy the regions so that you have enough steps for the whole clip.
Now we're going to get into some basic automation to make it sound like he's running away and coming back.
  1. In your Edit Window, find your Footsteps Track.
  2. Underneath the Track Name, find where it says Waveform and click the little arrow next to it.
  3. Select Volume from the list that drops down.
  4. In the video, find the point where he starts to run away and, using the Grabber Tool, click on the black line that runs through the track. You should see a dot appear.
  5. Now find the point where he is farthest away from the camera. Make another dot on the line.
  6. Now find the point where he comes back to where the bed is. Make a third dot.
  7. Now go back to the 2nd dot (where he's farthest away) and drag it to the bottom of the track.
  8. Play the video back from the beginning and see if the footsteps sound convincingly like someone moving away and coming back.
When you think you are finished, SAVE and show one of the instructors. If he approves it, turn it into the folder called Audio post FX1 folder in the Shared Media folder.