Showing posts with label ADSR. Show all posts

Tuesday, March 23, 2010

{ADSR assignment (pt. 2)_Guitar Patch}


For the next part of this assignment, we are going to create our own unique guitar sounds by sampling a guitar and then using the filters and other devices to make them sound interesting. Then you're going to use this sound in the beat you started working on in the last class.

"Where are we going to get these samples?" you ask.
Easy - you're going to record yourself playing guitar!

Check it out...

Part 1 - Recording Guitar
Everyone is going to take a turn and come up to the Instructor station. Then you're going to do the following:
  1. Launch Pro Tools and create a new session called: your name_guitar sample
  2. Create 1 new Mono Audio Track.
  3. Plug the 1/4" cable into the guitar and an input on the Digi 003.
  4. IMPORTANT! Underneath the gain knob of the Input that you plugged into, find the button called Mic/DI. Press it so that the orange light is on. If you don't do this, you will not be able to hear any sound from the guitar.
  5. Record enable your audio track.
  6. Pluck some of the strings and adjust the Input level so that you're getting a good strong signal (but not clipping!).
  7. Now pick up the guitar and get comfortable. When you are ready, put your finger on the C note here:
  8. Take the pick in your other hand and practice plucking the string. Try to get a nice clean sound without hitting any of the other strings.
  9. When you are ready, hit Record on Pro Tools and record yourself playing C. Don't stress about playing it perfectly right away. Just keep playing it as many times as you want until you feel like you got a good take. BUT, when you play the note, let it ring all the way out before you play it again. We want to get a nice clean waveform with a natural Decay and Sustain.
  10. When you feel like you've got at least one good recording, hit stop.
  11. Save the session.
  12. Copy it to your folder on the Shared Media drive.
  13. Go back to your desk and copy the Pro Tools session to your own computer.

Part 2 - Editing your Guitar Sample
  1. Open your Pro Tools session.
  2. Listen back to your performance and find the single best note in your recording.
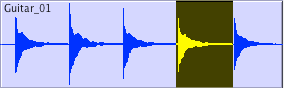
  3. Edit this note and Split it (Command E) into its own region. Be sure to zoom in and make clean cuts at the zero line crossing!
  4. Use the Grabber Tool and click on the note region to highlight it.
  5. Bounce the region out as an audio file. (File>Bounce to>Disk).
  6. In the Bounce window, change the Format to Mono (summed) and click Bounce.
  7. In the Save Window, change the file name to: your name_guitar_C
  8. Make a mental note of WHERE you are saving your file and hit Save.
  9. If you want to export any of your other notes, go back and repeat Steps 2-8. Don't forget to use a different filename!
  10. Save your session and quit Pro Tools.

Part 3 - Sculpting Your Guitar Sample
  1. Launch Reason and open the song you started last time (your name_ADSR style).
  2. Create an NN19 Digital Sampler.
  3. Right-click on the NN19 and click on Initialize Patch to clear out the preset instrument.
  4. Click on the Browse Sample button.
  5. Find your guitar sample and load it into the NN19.
  6. Play some notes and listen to how it sounds.
  7. Now you can get into shaping it to sound the way you want.
  8. First start by adjusting the Amp ADSR settings. Do you want the sound to be shorter? Lower the Decay and Sustain time. Do you want it to start with a fade in? Raise the Attack time. Do you want the notes to go on after you let go of the key? Raise the Release time.
  9. Next, move on to the Filters. First, pick which kind of filter you want to mess with and click the red light next to it. In case you forgot...BP = Band Pass, LP = Low Pass, HP = High Pass, Notch = Notch. Try first raising the FREQ slider to get it where you want, and then adjust the RES slider to really bring the effect out. Lastly, if you want to, try messing with the ADSR settings.
  10. Now if you really want to get some weirdness going on, try messing with the LFO section. I won't get too deep into this today, but basically, the LFO makes automatic adjustments to either the amplitude (loudness) of the sound, the filters, or the Panning (left-to-right movement). Try adjusting the settings and see what it does! Note: in order to hear the LFO working, you will need to turn up the Amount knob!
  11. Lastly, try connecting different FX devices to the NN19. Specifically, I suggest that you try the Scream Distortion or the Delay devices. Or both. Go nuts!
  12. Complete a beat that incorporates your guitar sound.
  13. Be sure to do File>Save Settings and check off all the samples.
  14. Save this as: your name_ADSR style.
  15. Put it in the Shared Media folder.

Thursday, March 18, 2010

{ADSR assignment (pt.1)_Making a Kick Drum w/ the Subtractor}

Now you're going to use the Subtractor to create an original kick drum sound. To do this, you will be working with a few different parts of the Subtractor, including the Oscillators, Filters, and ADSR envelopes. I don't want to overwhelm you with too much info before you get started with this, but here are a couple things that might help you make sense of what you're working with:

Oscillators
These are the heart of the Subtractor, meaning this is the section where the sounds are originally generated from. You have two Oscillators to work with, and you can change the basic types of sound waves to create different combinations of sounds to work with. Note that if you want to use both Oscillators, the light next to OSC 2 needs to be lit up!

Filters
We already worked a bit with filters last week. Remember, they let you remove different areas of the frequency spectrum (i.e. highs, lows, mids, etc.) We've got four basic types of filters to choose from, and they all reject different parts of the frequency spectrum. They are:
  • Low Pass (LP)
  • High Pass (HP)
  • Band Pass (BP)
  • Band Stop (aka "Notch")
Remember, the key word here is "pass"; what frequencies are being allowed to pass through the filter. In a Low Pass filter, the "lows" are being allowed to "pass". In a High Pass filter, the "highs" are being allowed to "pass". You can adjust the Cutoff frequency (the point where the filter starts working) by dragging the slider called Freq. So, in Subtractor, you can select whichever filter you want to work with by clicking on the red dot next to it.

ADSR
As we just discussed, ADSR controls how a sound evolves over time. However, you will notice, that there are actually 3 ADSR envelopes in the Subtractor: one for the Amplitude (the actual sound), one for the Filters, and one called Mod. I don't want to overwhelm you, but let's just say they all work in the same way, adjusting how quickly something kicks in and cuts off. For example, with the Filters, you might have a slow Attack time on the filters that doesn't kick in until after the sound has already started playing. You can get some really interesting and original sounds by messing with these.


Let's jump into this. Please do the following:
  1. Open Reason and start a new session.
  2. Create a Subtractor.
  3. Right click on the folder button to Initialize the patch.
  4. On Osc 1, select the sine wave. Set the Octave ("Oct") to 1.
  5. Make sure the Keyboard Tracking light is off.
  6. Find the Phase knob under Osc 1. Now find the three red lights to the right of the knob and click on the one next to the "-".
  7. Turn the Phase knob all the way to the right. (This is basically going to thicken up the sound.)
  8. Turn on the Noise generator and set the Decay to 40, Color to 0, and Level to 98.
  9. Go to the Filter 1 section and set the Frequency Slider to 64. Select the filter called LP12 by clicking the light next to its name.
  10. Now go to the Filter Envelope section and set A=0, D=40, S=0, and R=38. Turn the Amount knob to 65.
  11. Go to the Amp Envelope section and set A=0, D=34, S=0, R=40.
  12. Go to the Mod Envelope section and set A=0, D=36, S=0, R=30. Set the Amount knob to 70. Make sure that the Envelope Destination is Osc1.
  13. And you're pretty much done. Click on the Save Patch button and save this to your folder as "your name_My Kick.zyp".
  14. Open your BAVC gmail account and email me (crunde@bavc.org) your patch as an attachment.
  15. Now listen closely to this sound. Is there anything you'd like to change about it? What section of the Subtractor do you think you can adjust to get it to sound the way you want? Make any changes you feel are necessary and save it again.
  16. Start working on a song that uses your kick drum. Save it as: your name_ADSR style

Fundamentals of Sound (pt. 3)_Amplitude Envelope

In the last two classes, we've been learning about the basic aspects of sound. So far, we have mainly been focusing on frequency and training our ears to identify specific frequencies. Today let's talk a bit about another major part of sound: amplitude! (Related to, but not to be confused with attitude.)

We already know that amplitude basically refers to loudness, right? But when you hear a sound, does it usually have the same amount of loudness throughout it? Of course, it depends on the sound - a long, steady sound like a motor running might stay at a consistent level - but usually, sounds change in amplitude throughout their duration.

For example, let's look at this waveform of an 808 snare sound:

In this picture we can clearly see how the sound quickly goes from nothing (silence) to its highest amplitude, then falls off, and then gradually trails off.

This whole process is what is called the envelope of the sound. The envelope describes the way the amplitude evolves over time. Every sound has its own unique envelope and this is partly what makes it sound the way it does. For the most part, natural sounds tend to follow this same basic pattern of

silence -> highest amplitude -> getting quieter -> trailing off

Here is another waveform of an 808 kick drum:

Now we know that a kick drum sound different from a snare, but can you see how, even though they look somewhat different, they both have that same basic shape? Here's another pic of a guitar:


ADSR
So the more specific term for describing the envelope of a sound is ADSR. This stands for Attack, Decay, Sustain, Release. Briefly:

Attack - the rise of the amplitude from the start of the sound up to the highest level.
Decay - the drop from the highest amplitude down to the average level of the sound
Sustain - the average level of the sound
Release - the fade out from the average level of the sound down to silence; on a synthesizer, this is how quickly the sound cuts off when you let go of the key

Here is a common diagram of an ADSR Envelope:
And here is what ADSR looks like on an actual waveform:

Every sound has its own natural ADSR envelope, but with digital tools like samplers and synthesizers, you can actually manipulate these parameters and modify or completely change sounds. In fact, you have been looking at and working with ADSR envelopes for months now. Can you think of where? Here's one example:
Here's another:
What do you think the Amp stands for?

So today we're going to work on a couple of projects using the ADSR envelopes on the devices in Reason to create some original sounds.